

Mirror adhesives are one of those “looks easy until something fails” projects. If you use the wrong product, a heavy mirror can sag, pop off, or slowly creep over time. For most residential installations, mirror mastic is the best overall choice, while heavy-duty construction adhesive approved for mirrors makes more sense for heavier mirrors or slightly uneven walls. Small, lightweight mirrors may work with adhesive-backed mounting strips.
The safest choice depends on the mirror’s weight, the wall material, the mirror backing, and how well you can support it while the adhesive cures. Whatever product you choose, clean both surfaces, follow the labeled bead pattern, and use spacers or temporary support. For large or heavy mirrors, combine adhesive with studs, anchors, or a cleat instead of relying on glue alone.
Key Takeaways
- Best overall: Mirror mastic or heavy-duty construction adhesive made for glass and mirrors.
- Weight matters most: Follow the adhesive’s labeled capacity and use the recommended bead pattern for larger mirrors.
- Wall type changes everything: Drywall may need studs or anchors, while tile requires a product compatible with that surface.
- Surface prep controls failure: Clean with isopropyl alcohol, then let both surfaces dry completely.
- Avoid general-purpose glue: Hot glue, white glue, and standard super glue are poor choices for mounting mirrors.
- Plan for safety: Use spacers and temporary support, and add mechanical mounting for large mirrors.
Best Adhesive for Attaching a Mirror to a Wall
The best overall adhesive for attaching a mirror to a wall is mirror mastic made specifically for mirror mounting. It is designed to bond to glass and mirror backing materials without attacking the reflective coating. For a heavier mirror or a wall with small imperfections, choose a heavy-duty construction adhesive that explicitly approves mirror or glass installation.
The adhesive must handle two demands: it needs enough initial grab to keep the mirror from sliding, and enough long-term shear strength to support its weight. A wall may also be dusty, painted, textured, or uneven, so surface preparation and bead coverage matter as much as the product category.
Mirrors can fail in two main ways. The adhesive can release from the wall or backing, or the mirror can shift because the bead pattern provides too little contact or uneven support. That makes “works on plastic” or “bonds almost anything” products poor choices for this job. Look for a label that specifically mentions mirrors, mirror backing, or glass mounting.
The mirror’s construction matters, too. Some adhesives contain solvents that can attack the backing or reflective coating, eventually causing haze, staining, or delamination. If the product does not clearly say it is safe for mirrors, choose a different adhesive.
How to Choose Mirror Adhesive
Four details should drive your decision: the mirror’s weight, its size, the wall material, and the condition of the mounting surface. A well-known adhesive can still fail if it is incompatible with the mirror backing or applied to dusty, glossy, or uneven paint.
Use these rules when shopping:
- Match the adhesive to the wall. Drywall, masonry, wood, tile, and painted surfaces have different bonding characteristics.
- Match it to the mirror. Silvered mirrors and mirror tiles need products intended for mirror mounting, not merely products labeled for ordinary glass.
- Follow the bead pattern. A larger mirror needs enough adhesive contact to distribute its weight across the back.
- Plan for support during curing. Many adhesives gain strength over hours or a full day, and some mirrors will slide or lift if they are not braced.
- Add mechanical support for large mirrors. Studs, cleats, or properly rated anchors reduce the consequences of a weak wall surface or incomplete bond.
Do not expect an “instant bond” to equal the strength of screws within the first few minutes. Mirror adhesive usually develops strength gradually. Even a product with strong initial grab may need temporary support until it reaches handling strength and full cure.
💡 While this book focuses on career advancement, it shares the title of your shopping rules section for a helpful organizational mindset. 7 Rules of Power: Surprising–but True–Advice on How to Get Things Done and Advance Your Career.
Best Mirror Adhesives by Use Case
The best category depends on the installation rather than the adhesive’s marketing claims.
Best overall: Mirror mastic
Mirror mastic is the safest default for most standard bathroom and bedroom mirrors. Choose a product labeled for mirrors and glass, then apply it over enough of the back to distribute the load. It works especially well when you want a clean installation without visible fasteners.
Best for heavy mirrors
A heavy-duty construction adhesive is a better fit for a heavier mirror or a wall with small dips and imperfections. Its gap-filling ability can help maintain contact where a rigid adhesive would leave voids.
Use only a formula that explicitly approves mirror or glass mounting. A general-purpose construction adhesive may react with the mirror backing, even if it bonds well to the wall.
Best for small mirrors
Adhesive-backed mirror strips are convenient for small mirrors on smooth, flat, clean walls. They provide quick initial placement and avoid the mess of a liquid adhesive.
Their limitations are significant. They rely on consistent surface contact, so textured walls, peeling paint, dust, or slight wall curvature can lead to peeling or creep. Check the system’s mirror load rating before installation, and do not use strips as a casual substitute for structural support on a large mirror.
Best for unusual substrates: Two-part epoxy
Two-part epoxy can produce a very strong cured bond on unusual surfaces when the products are compatible with both the mirror and the wall. It makes sense only when you can mix it accurately, prepare the surfaces thoroughly, and tolerate a longer or stricter cure process.
Epoxy is not automatically mirror-safe. Confirm compatibility with the mirror backing before using it.
Best for early grab
A hybrid adhesive that combines fast initial grab with a durable cure can help when you need the mirror to stay in position quickly. It may suit medium or heavy mirrors on compatible walls, but it still requires bracing and careful surface preparation.
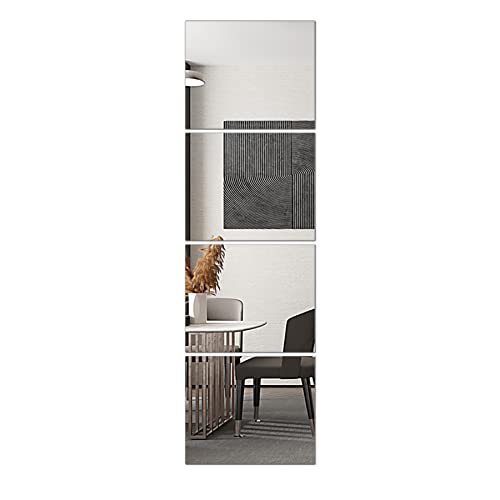
Helpful pick
Delma Glass Full Length Wall Mirror Tiles, 14'' x 12'' 4PCS
These glass mirror tiles are a perfect example of the type of project that requires specific mirror-safe adhesive for successful mounting.
Mirror Adhesive Comparison
| Option | Key spec/behavior to look for | Best for | Main tradeoff |
|---|---|---|---|
| Mirror mastic | Labeled for mirrors and glass compatibility, strong long-term hold | Most bathroom and bedroom mirrors | Needs proper support while curing |
| Heavy-duty construction adhesive | High gap-filling, long-term shear strength, glass-safe formula | Heavy mirrors and slightly uneven walls | Can be messier and requires careful placement |
| Mirror mounting tape strips | Adhesive tape rated for mirror loads, good initial grab | Small mirrors on smooth walls | Less forgiving if the wall is not flat |
| 2-part epoxy | Very strong cured bond, slow and strict mixing | Unusual surfaces and high-stakes mounts | Longer cure and demanding surface prep |
| Hybrid construction adhesive | Fast initial grab plus durable cure | Medium or heavy mirrors that need early hold | Still needs bracing, and compatibility must be verified |
Check the wording on the label before buying. Some products claim to work on glass but do not say they are safe for mirrors. That distinction matters because the mirror backing can react differently from bare glass.
How to Apply Mirror Adhesive Safely
Treat the installation as a support and alignment job, not a quick glue project. Prep the surfaces, mark the position, apply the adhesive consistently, and keep the mirror supported until the product has cured.
Start by removing dust, grease, soap residue, and silicone from both the wall and the mirror backing. If the wall has glossy paint, gently scuff it so the adhesive has a better surface to grip. Wipe the surfaces with isopropyl alcohol, then allow them to dry completely.
Dry-fit the mirror before opening the adhesive. Use painter’s tape to mark its outline and draw level reference lines. Place spacers beneath the bottom edge if the adhesive instructions call for them. Spacers help distribute the load and prevent the mirror from sliding downward while the adhesive sets.
Apply the adhesive in the pattern specified on the label. Avoid a few isolated dots, especially on a larger mirror, because limited contact can allow the mirror to bow or shift. Use consistent beads across the contact area, with coverage positioned to support the mirror’s edges as well as its center.
Brace the mirror immediately after placement. Shims, temporary supports, or a cleat can keep it level while the adhesive cures. Do not expect the adhesive to correct a misaligned or shifting mirror on its own.
Keep the area free from bumps and vibration until the label’s curing time has passed. If the adhesive requires 24 hours for full strength, treat that as 24 hours rather than assuming it will be ready the next morning.

Helpful pick
Unbreakable Mirror Tiles, 4PCS 10”x10” Peel And Stick on Mirror for Wall Mirrors Decorative, Toddlers for Kids Bedroom, Plastic Gym Frameless Door Small Adhesive Mirrors for Classroom Decor Stickers
These peel-and-stick mirror tiles demonstrate the importance of proper surface preparation and alignment before applying adhesive to your wall.
Why Use Adhesive Instead of Visible Fasteners?
The right adhesive creates a cleaner appearance with fewer visible holes or brackets. It spreads the load over a broader area than a few point fasteners, which can also reduce the chance of stressing or cracking the mirror at isolated mounting points.
Adhesive can accommodate small imperfections in a wall because mirror mastic and construction adhesive fill limited gaps. That makes it useful for bathroom mirrors and frameless styles that sit directly against the wall.
Some adhesives also allow a short repositioning window during setup. That can help when aligning multiple mirrors or working around switches and outlets. Once cured, the bond should withstand ordinary handling, provided the product, wall, mirror backing, and application method are compatible.
Removal is the main drawback. A strong adhesive bond may require scraping or sanding and can damage the wall finish. If you are unsure about the final position, install a temporary cleat first, confirm the alignment, and bond the mirror only after you are satisfied with the layout.
Practical Mirror Adhesive Choices
A standard medium-size framed bathroom mirror on painted drywall usually calls for mirror mastic. Lightly scuff glossy paint and use spacers or temporary support until the adhesive cures. This approach avoids screw holes and reduces the chance of cracking the mirror with point hardware.
A larger, heavier mirror on a slightly uneven wall is a better match for heavy-duty construction adhesive approved for mirrors or glass. Its gap-filling ability can bridge small wall dips, while a denser bead pattern can distribute the load. The mirror still needs bracing because gap-filling does not make the adhesive self-leveling.
A small hallway mirror on a smooth, properly prepared wall may work with adhesive-backed mirror mounting strips. The wall must be flat and clean, and the strip system must be rated for the mirror’s load. Textured walls and peeling paint are common reasons these installations fail.
Tile and specialty surfaces require closer attention to compatibility. Hybrid adhesive or epoxy may be appropriate, depending on the product instructions, the mirror backing, and the amount of preparation you are willing to do. Choose the product that specifically approves both materials rather than assuming a glass-rated adhesive will bond safely to every type of tile.

Helpful pick
yuntop 2 Pack Self Adhesive Acrylic Mirror, 2MM Flexible Plastic Mirror, Shatterproof PS Frameless Wall Mirror for Bathroom Vanity and Entryway (6 x 6 inch)
This flexible acrylic mirror is an excellent choice for a medium-size bathroom mirror installation when you want to avoid drilling holes.
When Adhesive Alone Is Not Enough
Adhesive is not the best sole safeguard for every mirror. A large, tall, or heavy mirror deserves mechanical support such as a cleat, studs, or properly rated anchors, especially when the wall is drywall or the installation is in a high-moisture bathroom.
A weak wall surface can fail even when the adhesive itself is suitable. Paint can peel, drywall paper can separate, and dust can prevent a proper bond. Mechanical support reduces the risk if the surface bond underperforms.
FAQ
What adhesive is best for attaching a mirror to drywall?
Mirror mastic made for mirror mounting is usually the best choice because it is designed for glass and mirror backing materials. On painted drywall, lightly scuff glossy paint, wipe the surface with isopropyl alcohol, and let it dry completely before applying the adhesive. Use temporary spacers or a brace until curing is complete so the adhesive is not forced to hold a shifting mirror by itself.
How long does mirror adhesive take to set?
Most mirror adhesives reach handling strength in hours, but full cure often takes closer to a full day or more. Follow the label’s instructions for “set” versus “full cure,” and keep loads, bumps, and vibration away from the mirror during the early curing period. If you are unsure, plan on 24 hours of careful support before trusting the bond fully.
Will construction adhesive work for mirrors?
It can, but only when the construction adhesive is explicitly rated for mirror or glass mounting. General-purpose construction adhesives may react with the mirror backing over time. Choose mirror mastic or a construction adhesive that specifically states it is safe for mirror installation.
What is the most common mistake when attaching a mirror with adhesive?
The most common mistakes are using too little adhesive and failing to support the mirror while it cures. A few isolated dots may not provide enough contact for the mirror’s weight. Dust, silicone residue, grease, and glossy paint can also prevent the adhesive from bonding properly.
Can I use double-sided tape instead of adhesive?
Yes, for small mirrors on smooth, flat, clean walls, provided the tape system is rated for the mirror’s load. Tape is less suitable for larger mirrors or uneven walls because it depends on consistent contact and can peel or creep over time. Brace the mirror while the bond develops, and verify the product’s mirror load rating before installation.